Note-Taking App
Advanced and feature-rich note-taking application. Works both as a web app
(PWA) and electron-based desktop application.
Offers full offline-support, note content
encryption and cross-device synchronization.
Content
Demo Video #
Features #
🗒 Create Notes
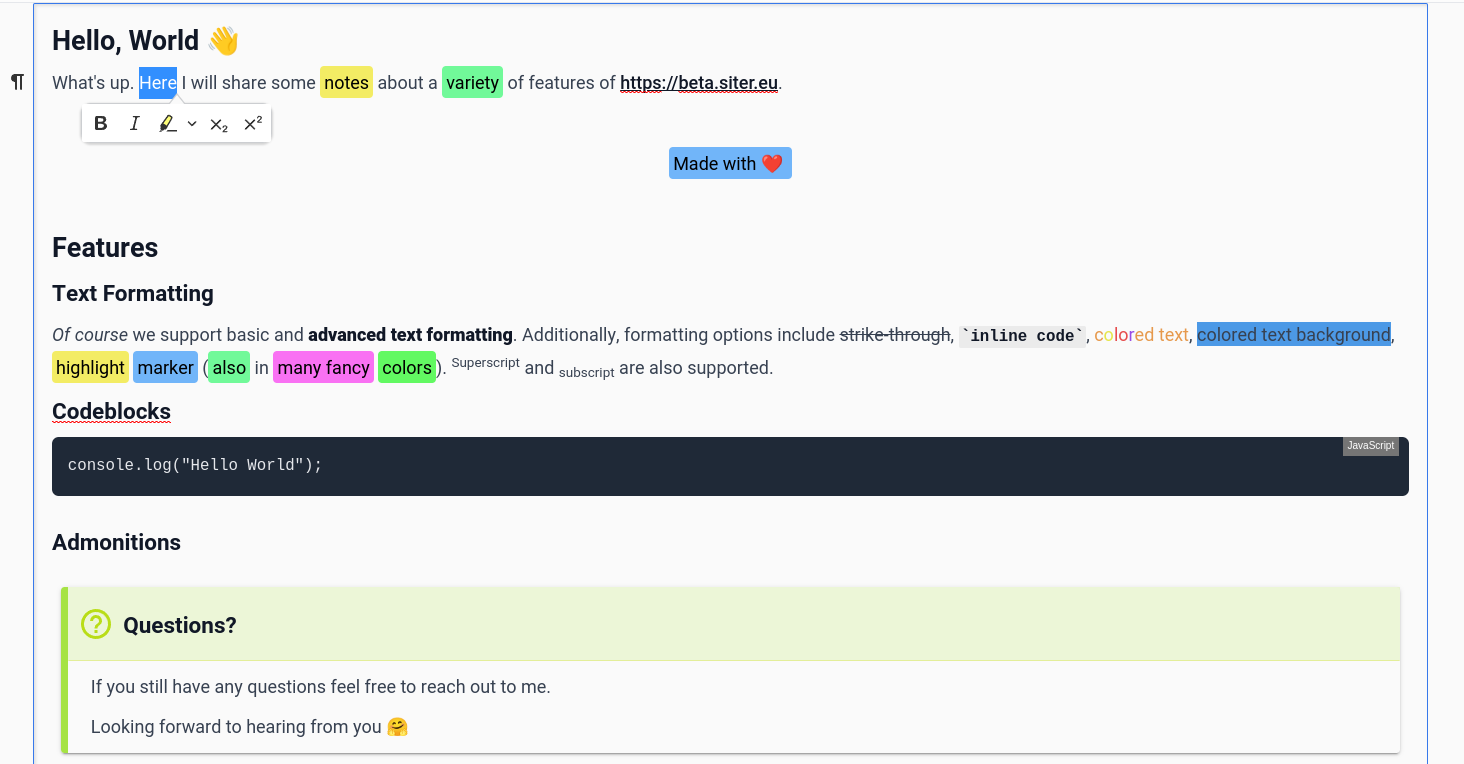
Feature-Rich Editor
The advanced and feature-rich rich text editor (CKEditor) makes it easy for you to capture and organize your thoughts and ideas.
Use-Cases
Whether you're working on a project at work, studying for an exam, or just jotting down some notes for personal use, our app has you covered. With a range of formatting options and the ability to add images and other media, you'll be able to create notes that are both visually appealing and easy to read. Plus, with full offline support and cross-device synchronization, you'll always have access to your notes no matter where you are or what device you're using.
🔐 Note Encryption
Full Note Content Encryption
Your personal notes may contain sensitive information that you want to keep private. That's why the note content is encrypted with a personal password to help protect your data.
With this feature, you'll be able to secure your notes with a password, ensuring that only you can access them.
Whether you're working on a confidential project at work or just want to keep your personal notes private, our note encryption feature gives you the peace of mind you need.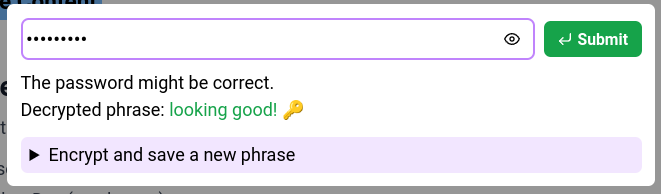
📄 PDF Export
Export as PDF
Exporting a note as PDF allows you to also use your notes in other application. You can also archive your notes as PDF to have them accessible to read everywhere and at every time.
Share Notes as PDF
You can easily share your notes with others as PDFs. With our PDF export feature, you can easily convert your notes to a PDF document and send them to anyone you choose.
Whether you're collaborating with team members on a project or just want to share your notes with a friend, the PDF export feature makes it simple and convenient.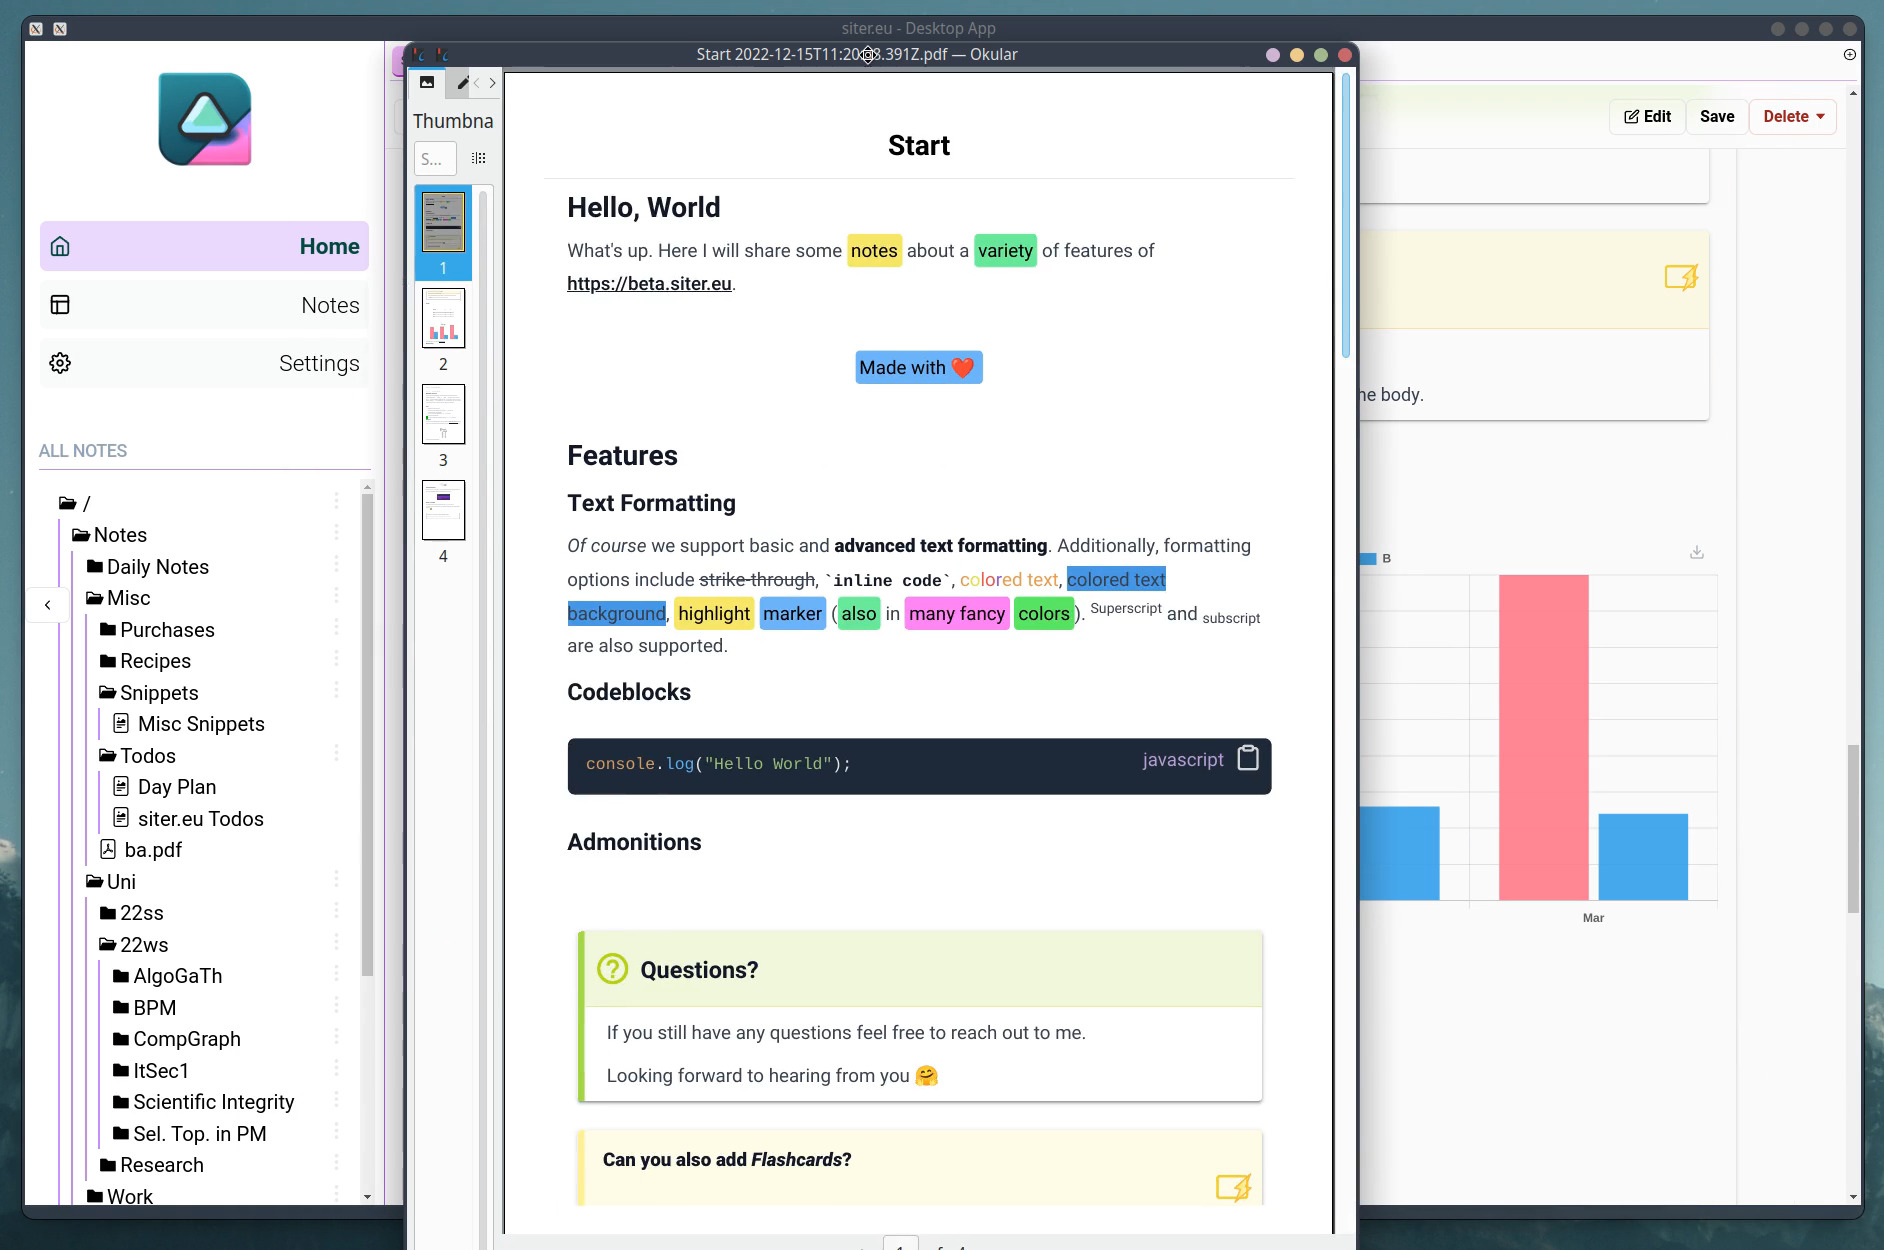
📊 Integrated Charts
Create Charts
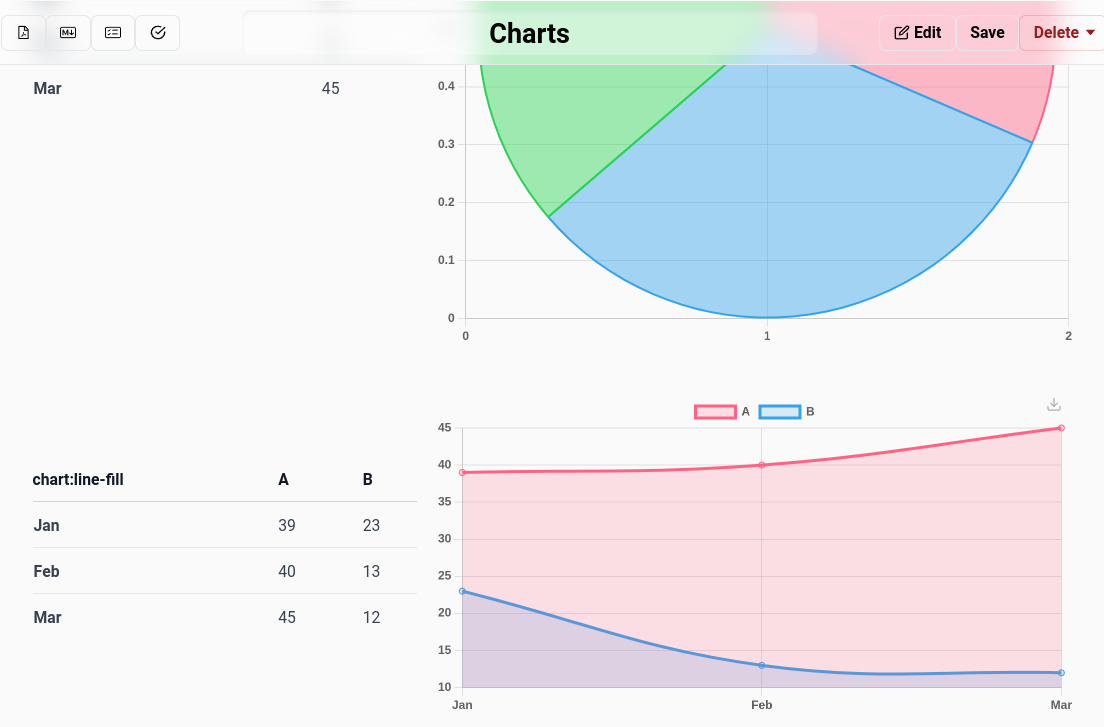
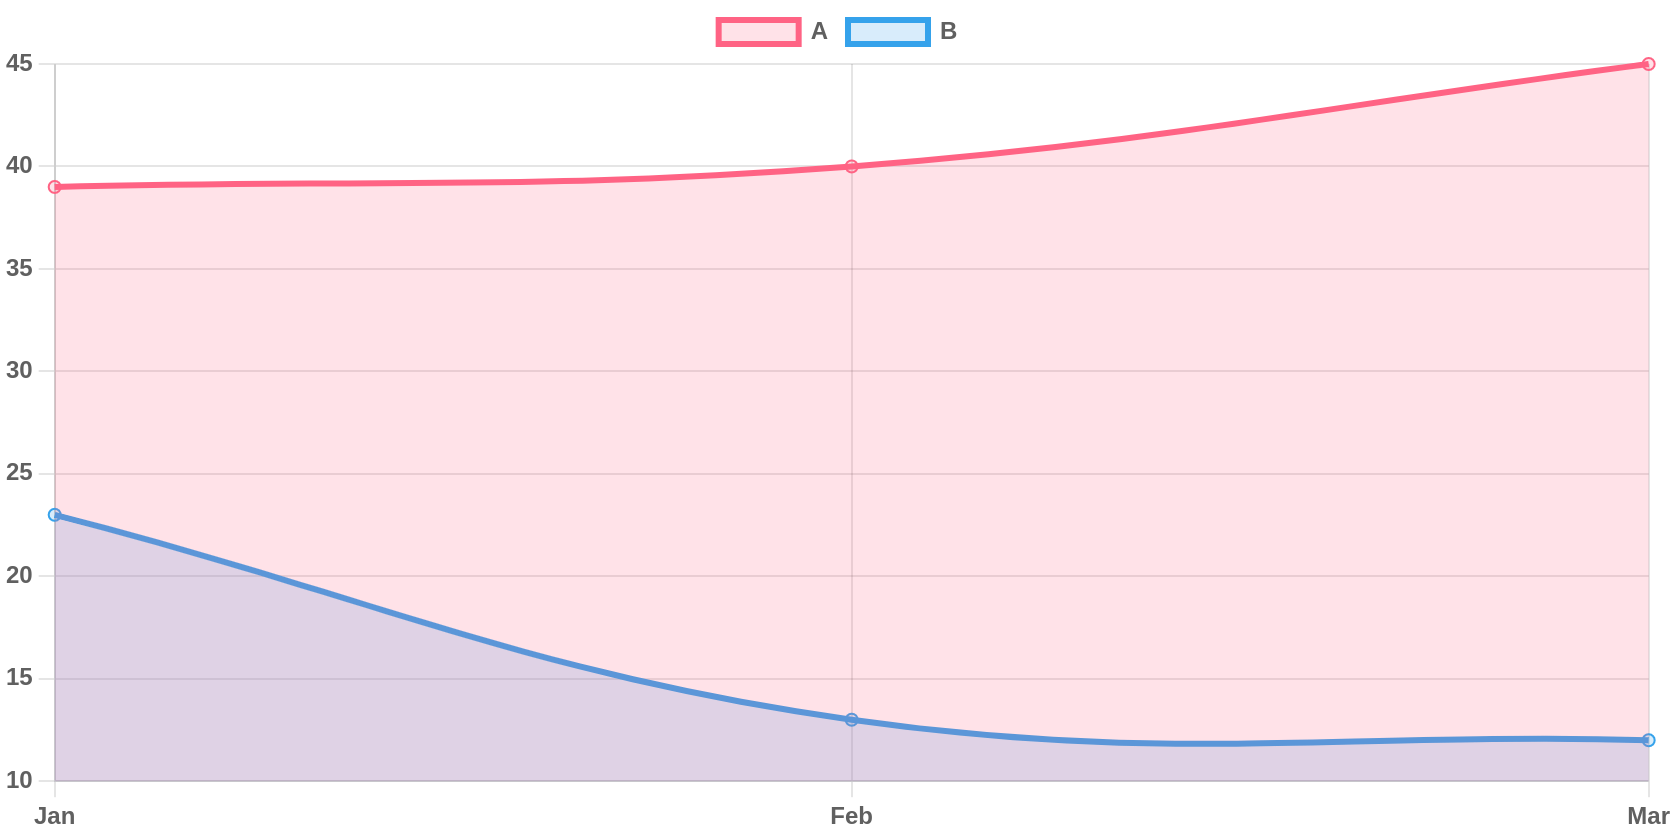
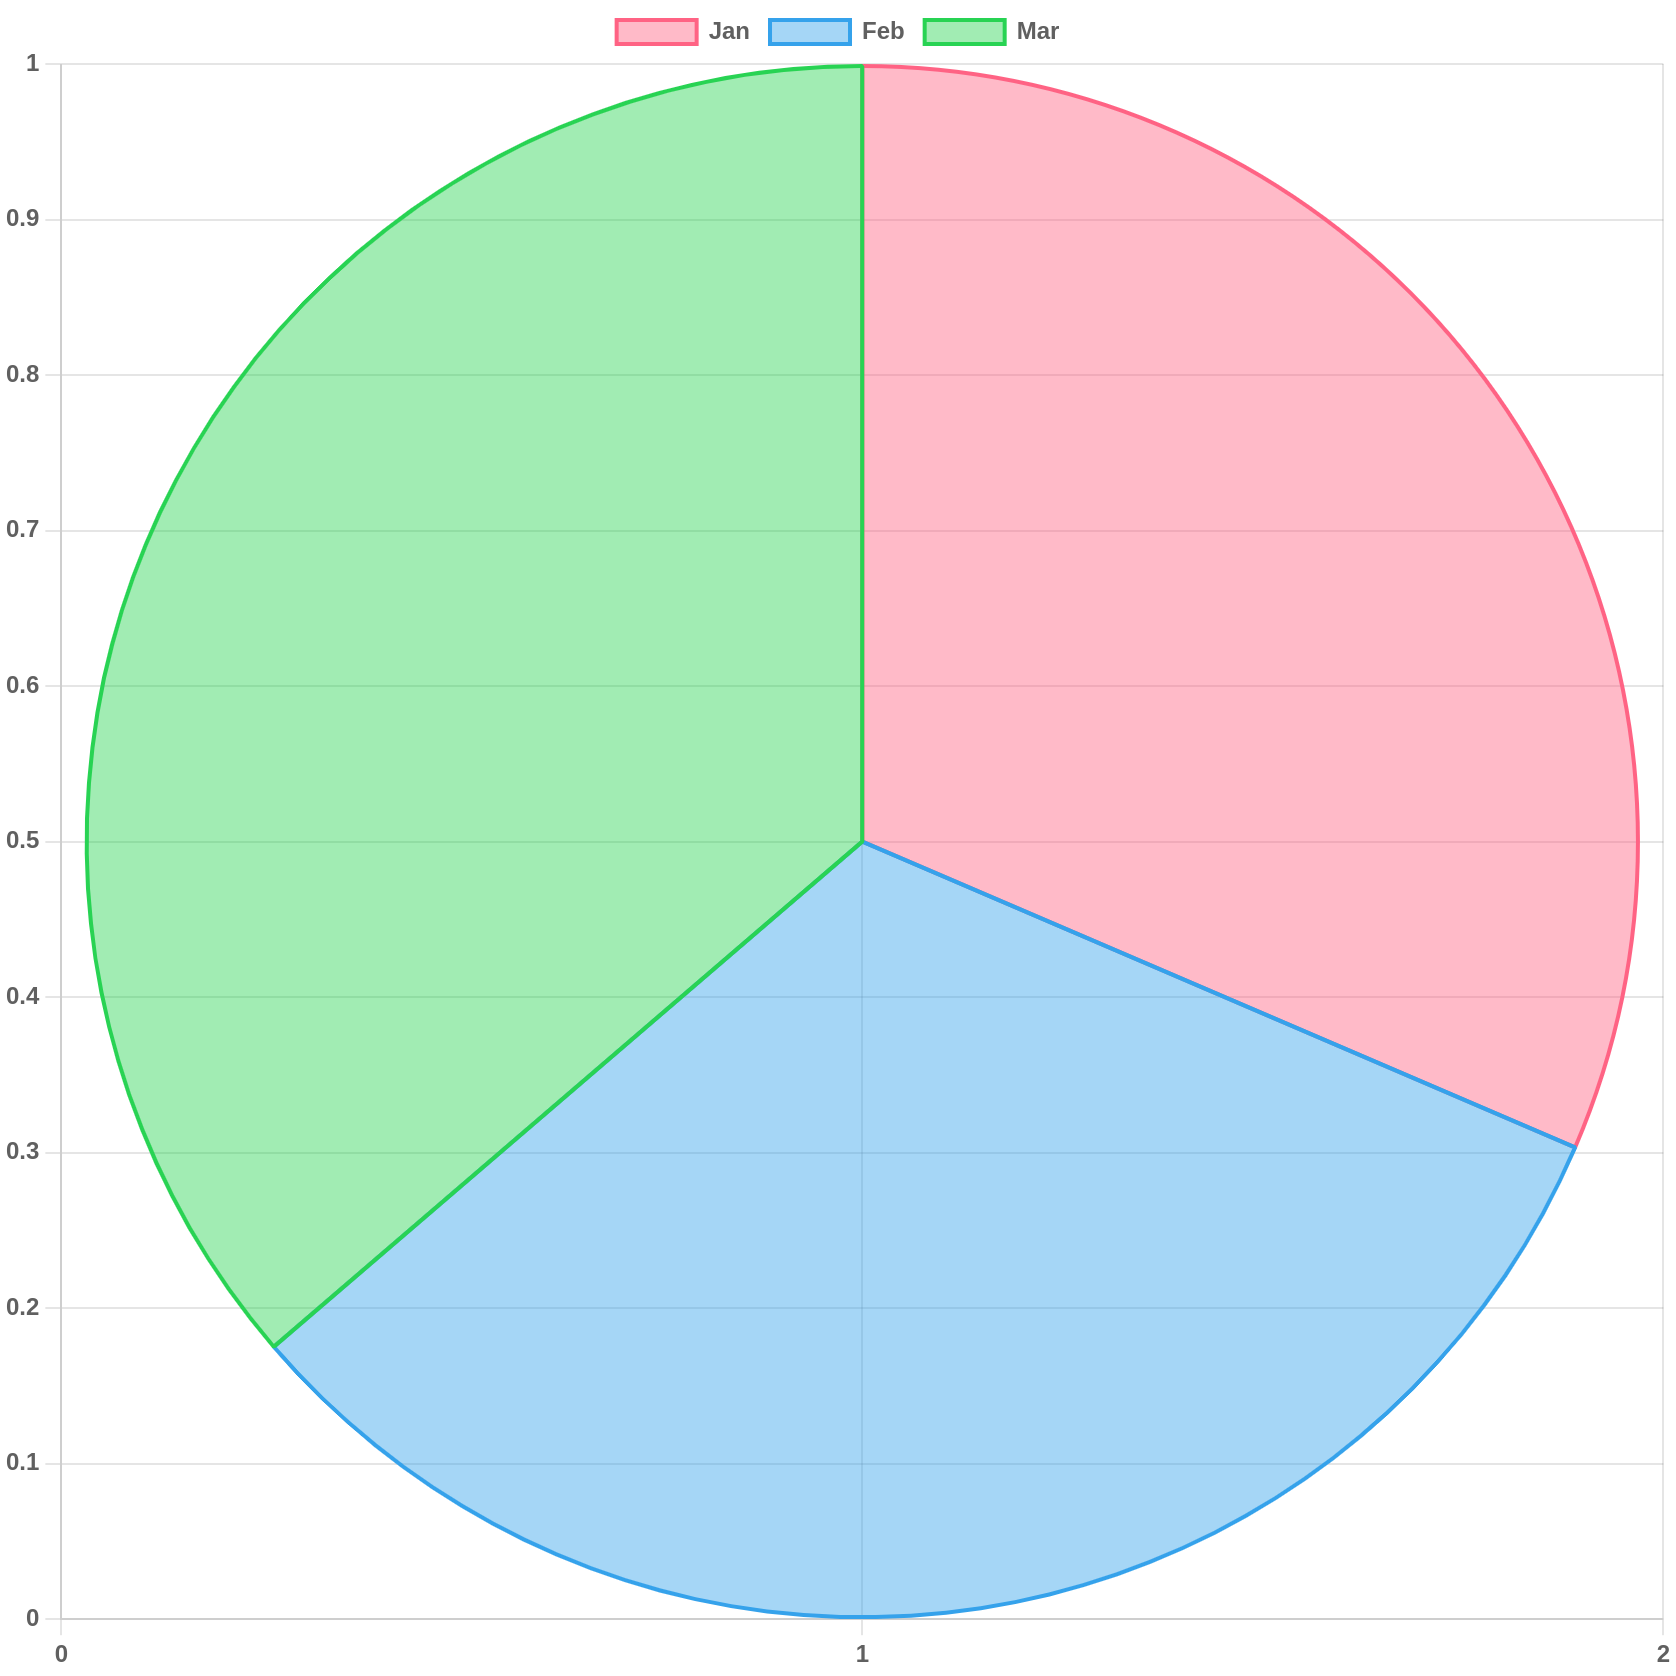
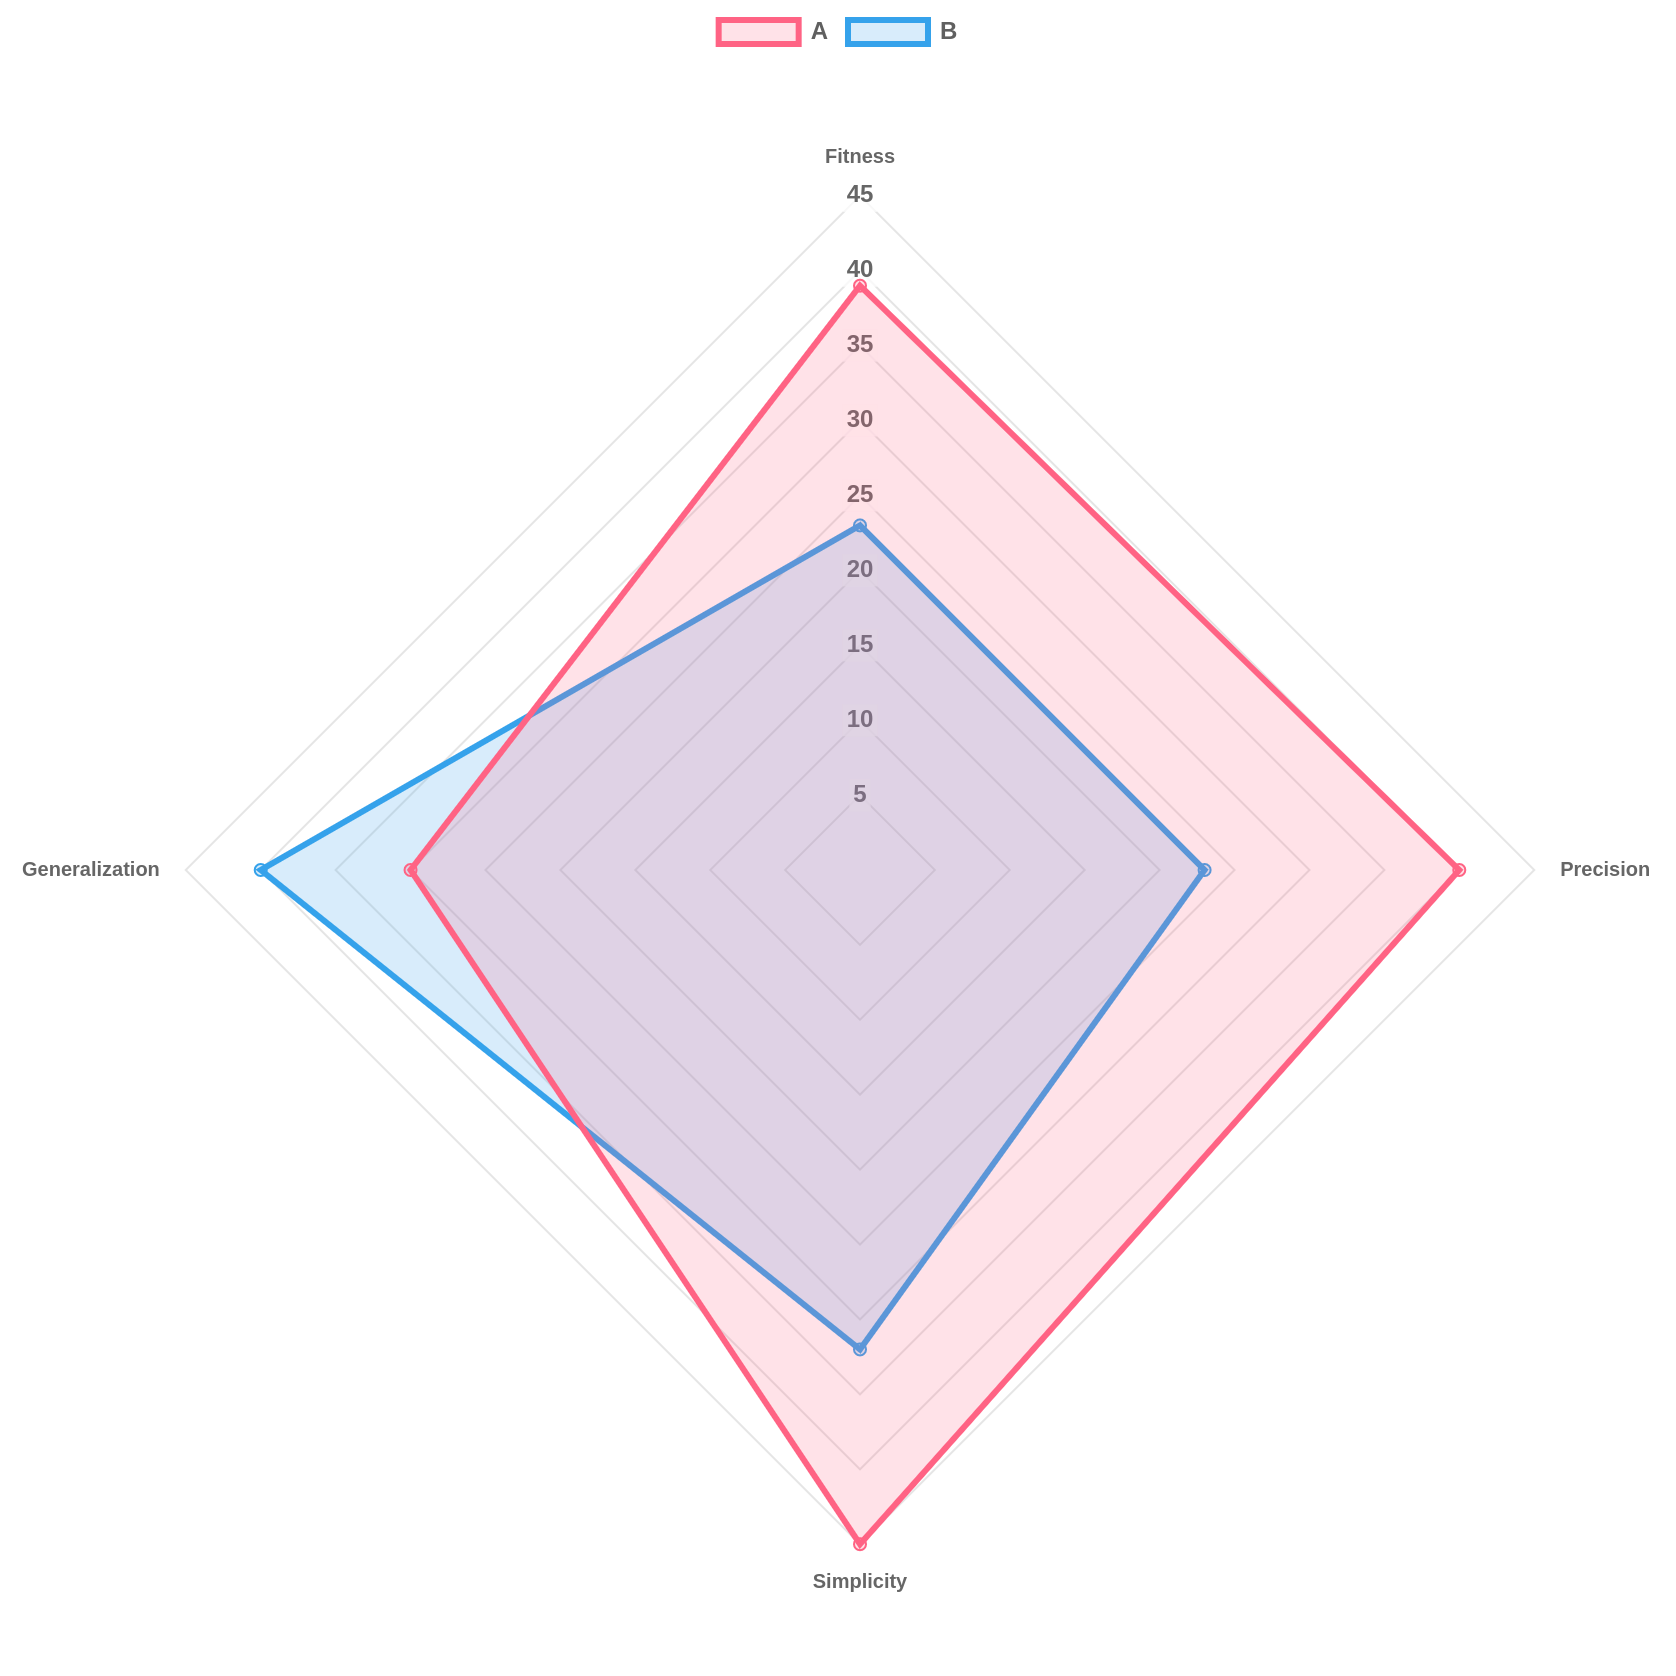
With our note-taking app, you can easily create interactive charts in your notes to help visualize and analyze your data. Simply create a table and add the prefix "chart:" in the top left cell. Our app supports a range of chart types, including bar charts, line charts, radar charts, and pie charts.
The easiest way to get started is to type\in the editor to start writing a command. Then type "chart" and select the Insert Chart option which appears. This will create and insert a sample bar chart with some data as a table into your note.
You can then change the labels and values in the table and even add new rows or columns.
Visibility of Interactive ChartsCharts are only rendered in view mode.
The charts are only visible if you finish editing your note and switch back to the view mode using the corresponding button on the top right of the note panel.
Thus, they do not distract you from entering your data and editing your note.Chart Types
As mentioned before, a number of different chart types are currently supported. Change the text in the top-left header cell to one of the following options, to try them out:
chart:bar(Bar chart)chart:pie(Pie chart)chart:line-fill(Line chart with filled area below the lines)chart:radar(Radar chart)

⚡ Flashcards
Create Flashcards
You can create flashcards in your notes and study the flashcards included in a note. To create flashcards, you have multiple options. The simplest one is using the auto formatting: Simply type
!!! flashcardand press space. This will create a flashcard with a front side (heading) and back side (content).Flashcard Title: This is the front side of your flashcardThis is the content or back side of your flashcard.
It traditionally contains the answer to the question included on the front side.Study Flashcards
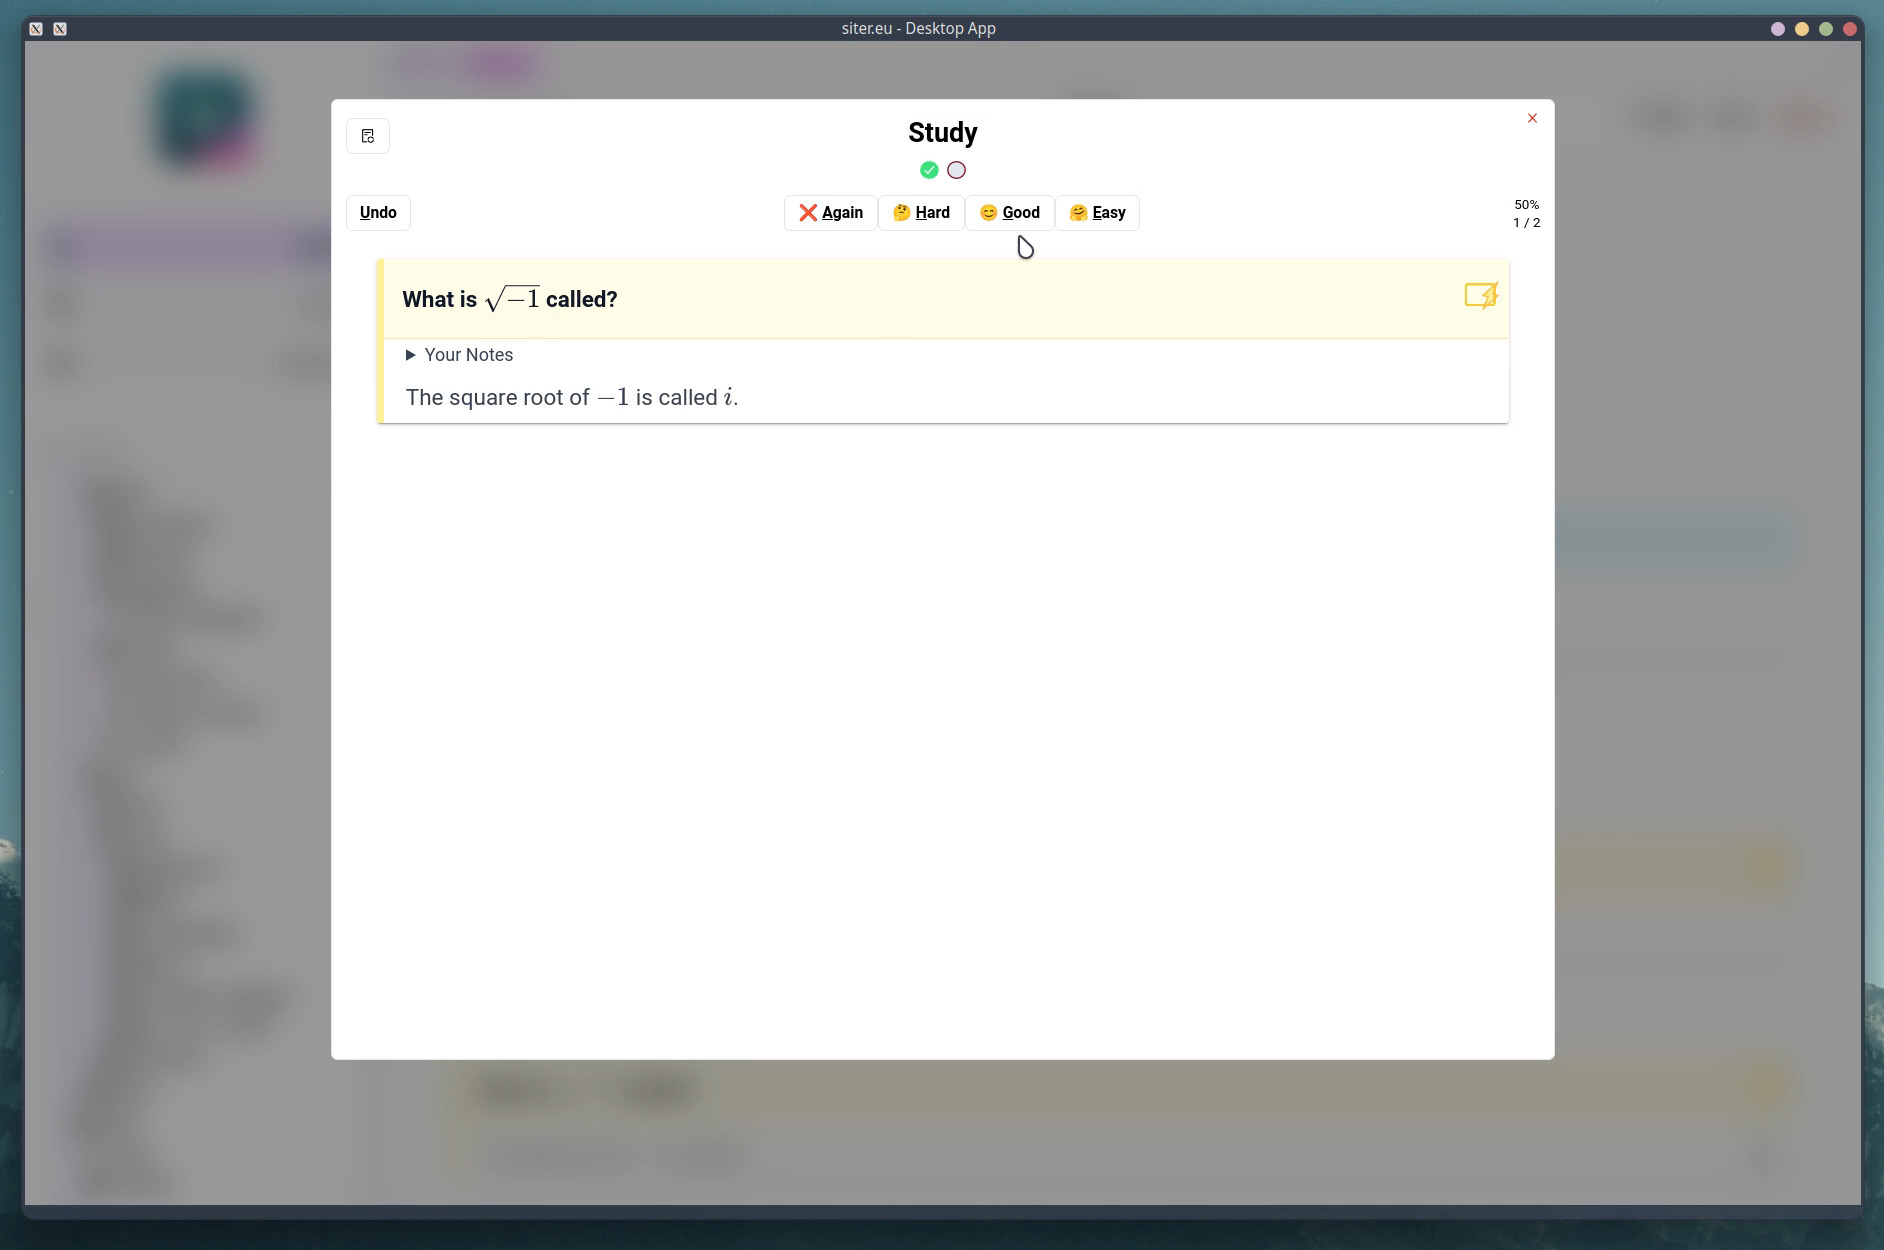
Once you created a few flashcards in your note, you can start to study them using the study UI.
To start, simply press the flashcard button at the top left of the note panel. This will open the study UI panel, where you can study all the flashcards in your current note.
A random order of the flashcards will be selected. First, only the front side of the flashcard is visible. This gives you the opportunity to think and check if you know the answer yourself. Pressing the Show Answer button reveals the back side of the card, allowing you to check if your answer was correct. You can then press one of the appearing buttons, based on how easy or hard answering the question was. Depending on what option you choose, the flashcard will be presented again later, until you confidently learned its content.Sync Flashcards with Anki
Coming Soon!
⌨️ Markdown Support
Write Markdown
While the default editor experience uses a WYSIWYG HTML editor, you can also write your notes in Markdown. For that, create a note item and set the type to
text/markdown. Then, once you open this note, a code editor with Markdown syntax highlighting will open on the left. On the right, a live preview of the rendered markdown is shown.Markdown Syntax & Features
In this full markdown mode, many advanced syntax and features are supported.
Math Expressions (LaTeX)
You can include math expressions using KaTeX using LaTeX, separated using dollar signs (like for example,$a_0 + \sum_{i=1}^n a_i \cdot x^i$).
Highlighted Text
By wrapping text between double equal signs (like==test==) you can create highlighted text, which will be rendered as HTML mark elements and with a vibrant and highlighter-style background color.
Admonitions (Callout Boxes)
Admonitions can be created by using the exclamation mark notation (!!!). There are many different types of admonitions, for example note, example, warning or tip. Each type has appropriate icons and styles associated with it.
A minimal example would be:!!! note "Test" ...As an alternative syntax, the header of the admonition can be specified as the section before the first dividing line (---) with empty lines before and after it. This also allows more complicated content and longer title sections (e.g., containing other markdown block elements).Markdown Shortcuts
Before you completely switch over to markdown formatted notes, you can also try the markdown shortcuts in the HTML editor. Most of the usual Markdown syntax is supported as smart auto formatting.
For example, writing_test_will turn the word test italic. Writing__test__or**test**will turn the text bold.
Two dollar signs, for example$x_1$, can be typed to quickly create LaTeX expressions.
Admonitions can be created using the !!! Markdown syntax mentioned above together with the note type, e.g.,!!! note.
Note, that most of the time you will have to hit space in order for the auto formatting to apply.Convert Markdown ↔️ HTML
You can also convert markdown notes to HTML notes and the other way around. For that, make sure to save the content and click the corresponding button on the top left of the note panel.
Caution
Not all features are 100% compatible across the HTML and Markdown format. Please check carefully if all content was converted correctly and make sure to back up your data beforehand.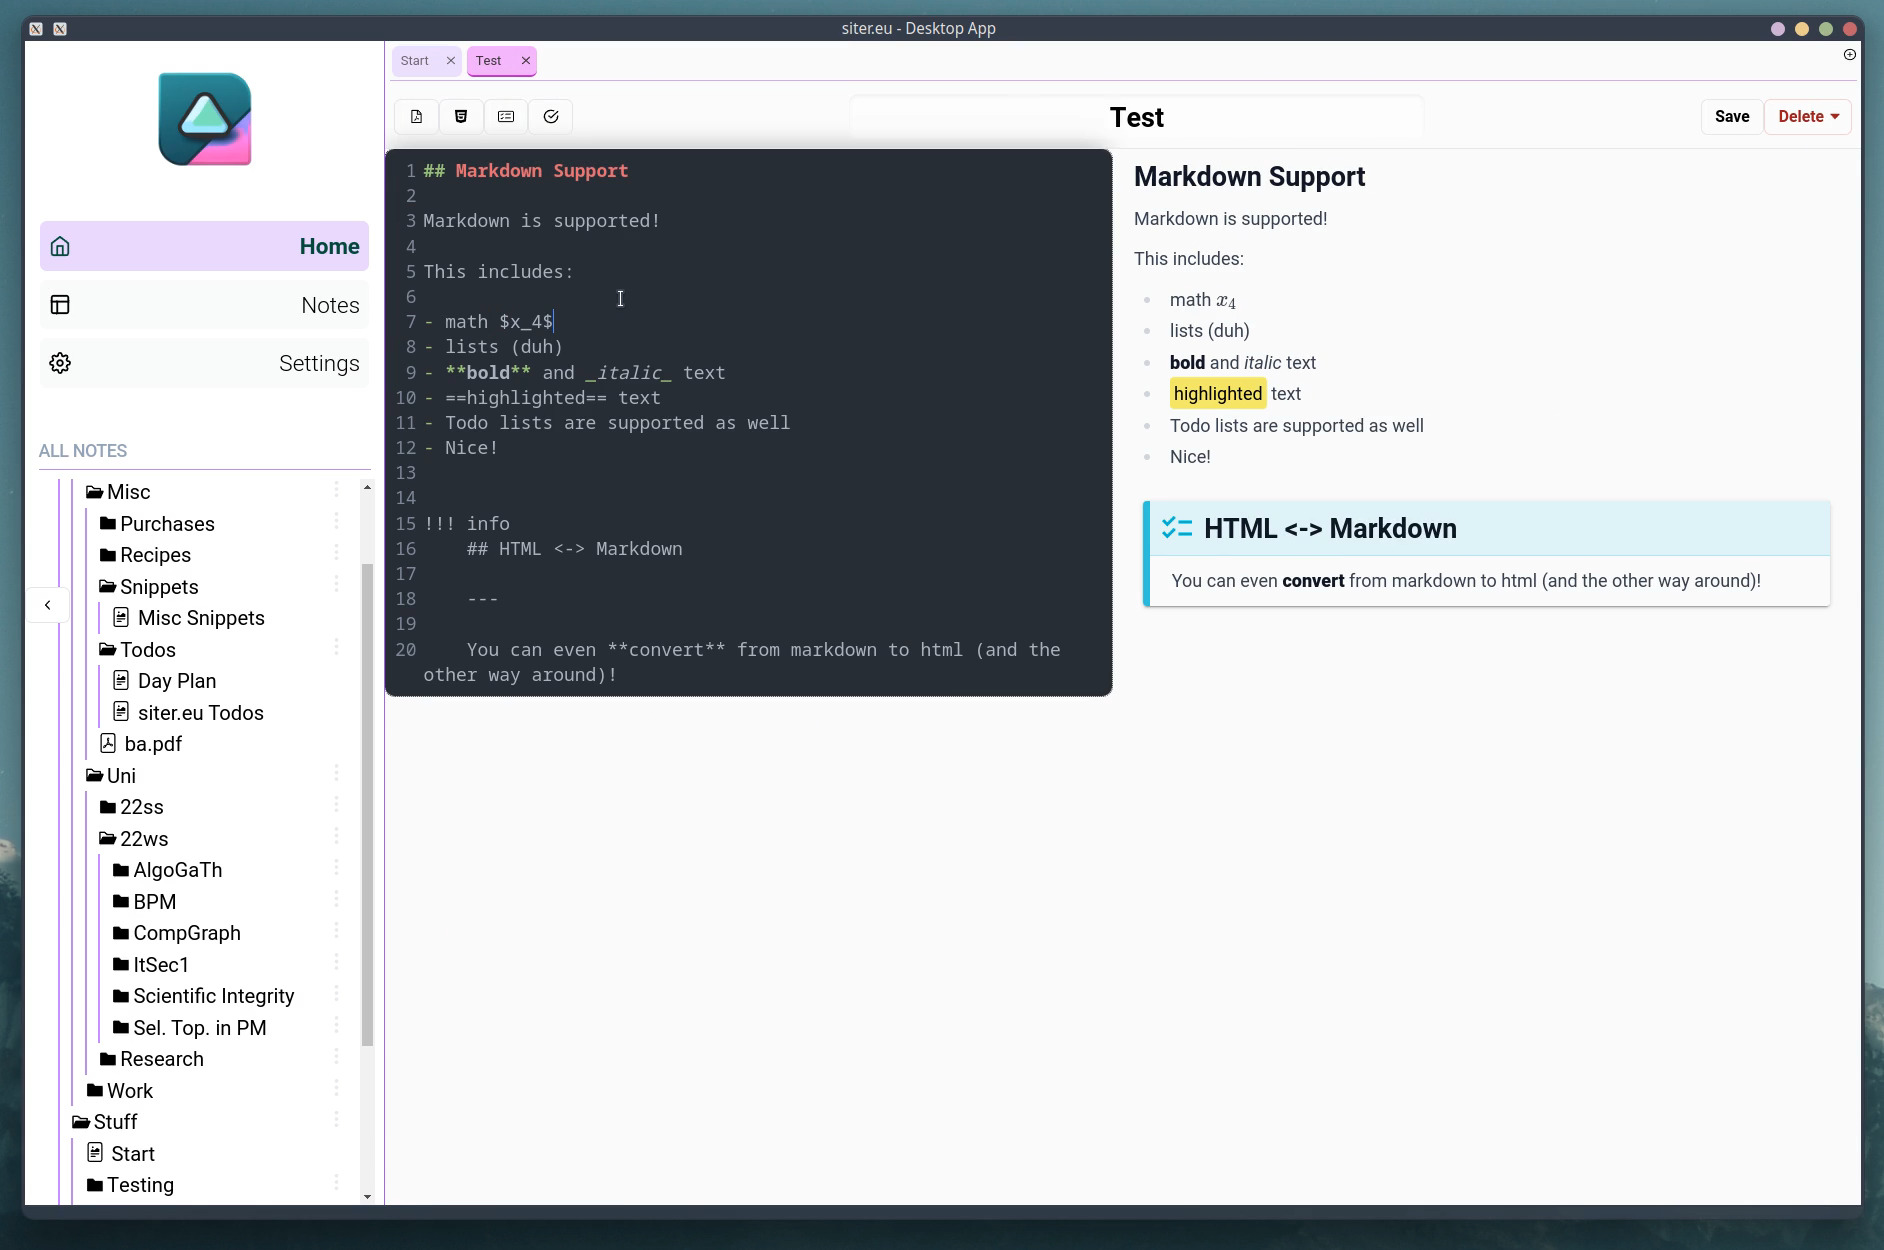
✍️ PDF Annotations
View PDFs
You can select PDF files (like any other file type) when creating a new note item. Once finished, by simply selecting the PDF from the note tree on the right you can view the PDF's pages.
Annotate PDFs
In the same view as you can view your PDF's pages, you can also annotate them to your liking. For that we have crafted a seamless integration of Excalidraw (the popular open-source whiteboard web app), allowing you to draw, write and annotate the PDF to your liking. Even handwritten notes, created for example using a iPad or Wacom drawing tablet, is possible.
Export Annotated PDFs
Once you have annotated a PDF document in your notes, you can easily export the annotations together with the file in a standalone PDF. It will contain all the PDF content together with you annotations, embedded as scalable SVG. This allows you to share your thoughts or comments with other people, or archive your annotated PDF.
Limitless Margin Notes
Don't feel limited by the PDF's original page size. You can continue writing outside the original PDF's pages without problems and expand your ideas to infinity!
Of course, all content, even if it's larger than the original PDF, will be included in the annotated PDF export.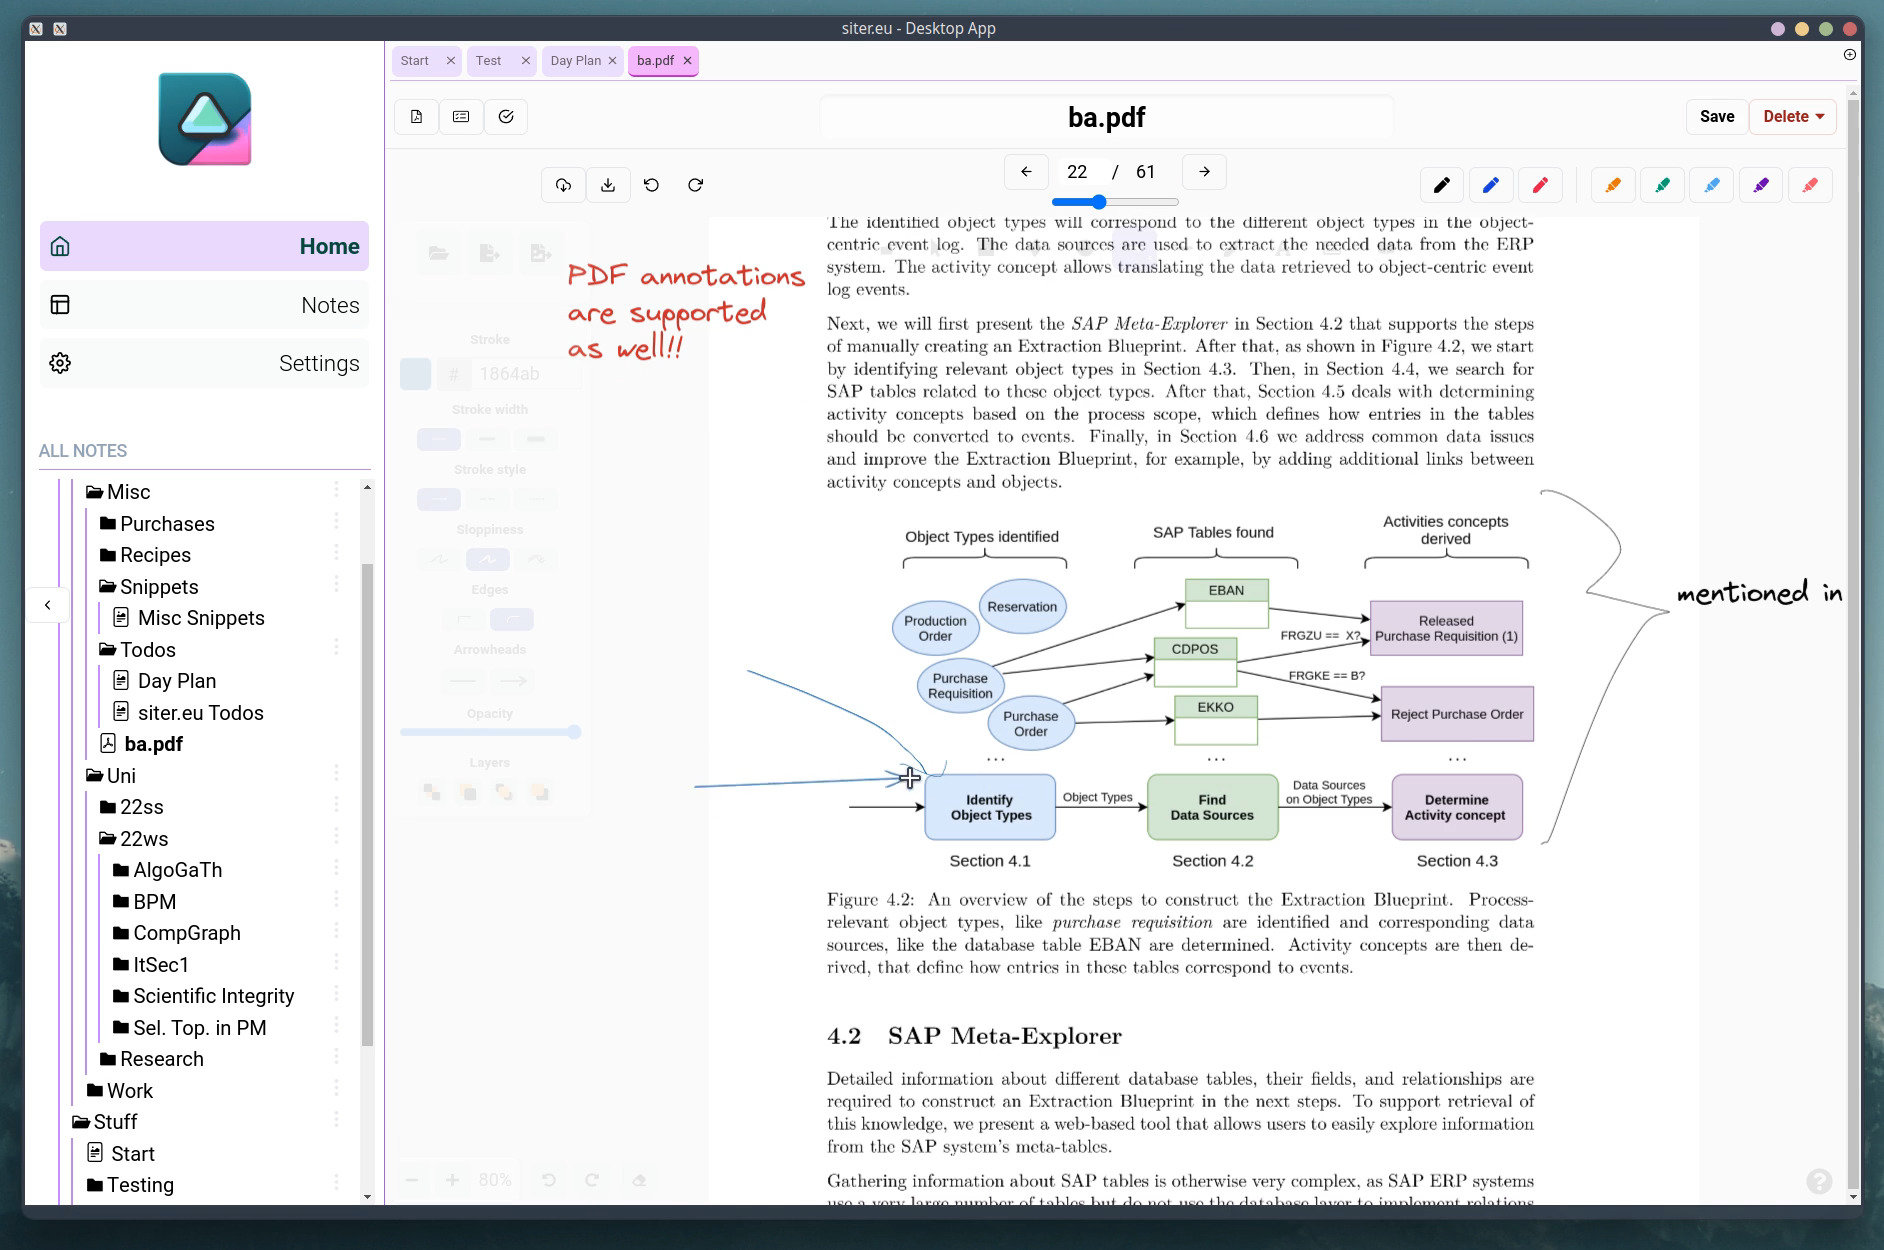
✅ To-dos and Day Planning
Todos
To create to-do elements, simply choose the accompanying icon in the block editor icon.
Alternatively, you can use the markdown auto-format- [ ].
To toggle if the to-do item is done or not, click on the checkbox icon. As a keyboard shortcut Ctrl+Enter can be used to toggle the checked status.Day Plan
To create a day plan, create a note for that day and make a list of to-do elements. Start each to-do item with the time, where you plan to start that task. Make sure to use a 24h-format for the timestamps, e.g. 10:30 or 22:15.
Once you have created your first few day tasks, click on the checkmark button on the top left of the note panel to open the day planning overview. From there, you can also add new day to-dos using the plus icon at the bottom. On the left side of the planning panel, a timeline of your day together with your tasks is shown.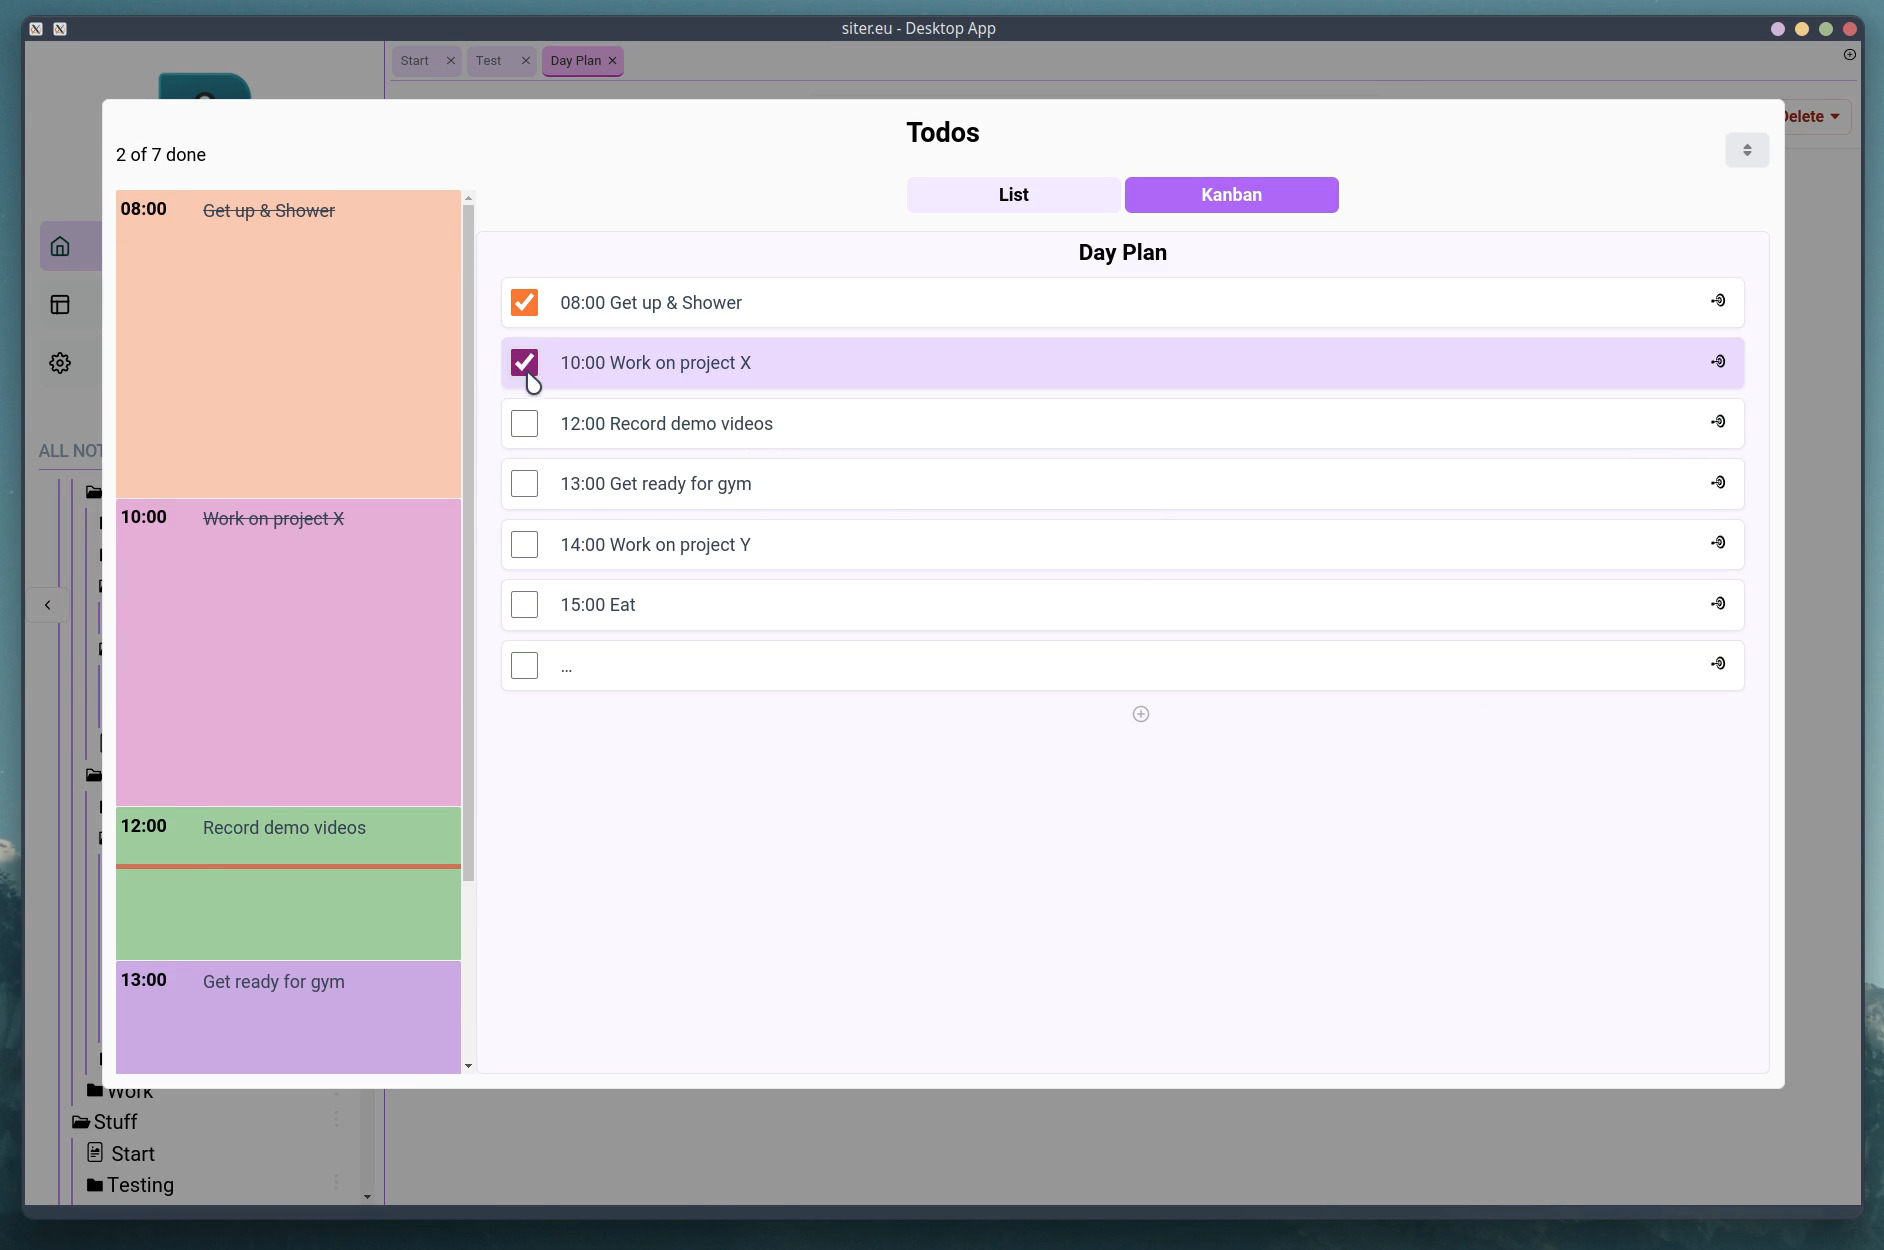
Technology #
- React
- Electron
- NextJS
- PouchDB/CouchDB
- Headless UI
- PWA
Links #
- Github (not public yet): https://github.com/aarkue/siter.eu-monorepo